الطابق 1، رقم 3، شارع شوغانغ، بلدة هونغمي، مدينة دونغقوان، مقاطعة قوانغدونغ، الصين

صانع غرف الاختبار البيئي لمدة 20 عامًاأكثر من 3000 تسليم للعملاء حول العالم   البريد الإلكتروني: shirley@deruitest.com
خط المساعدة العالمي للاستشارة:+86 15580327593

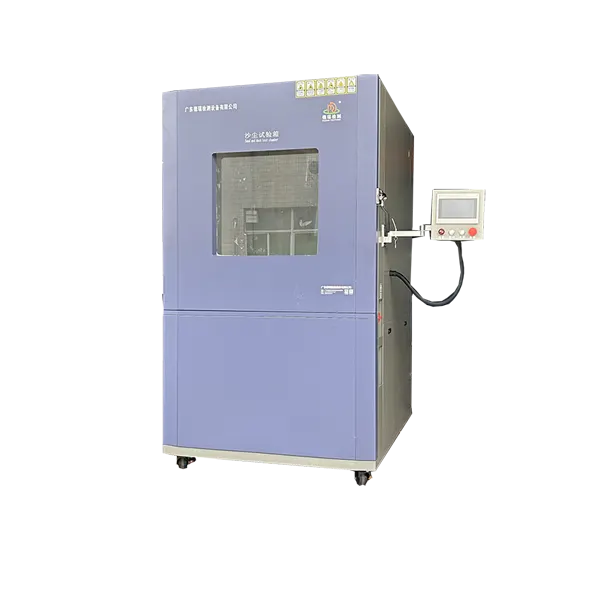
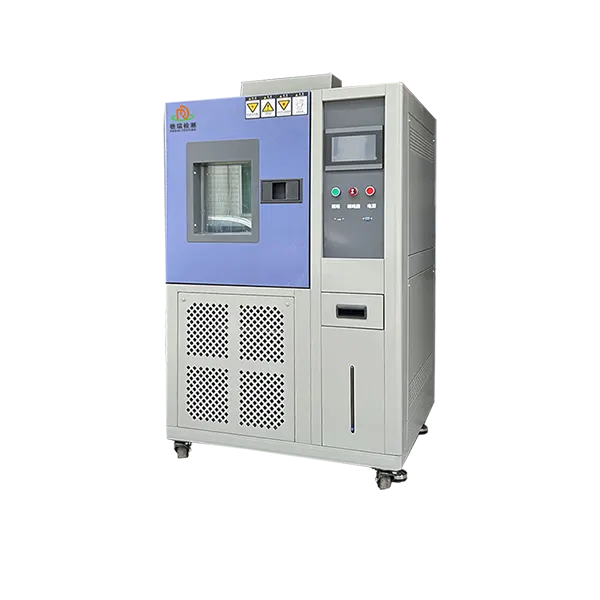
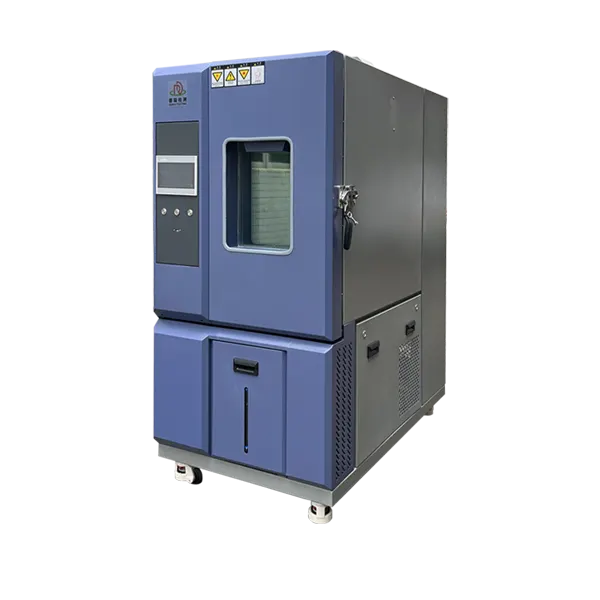
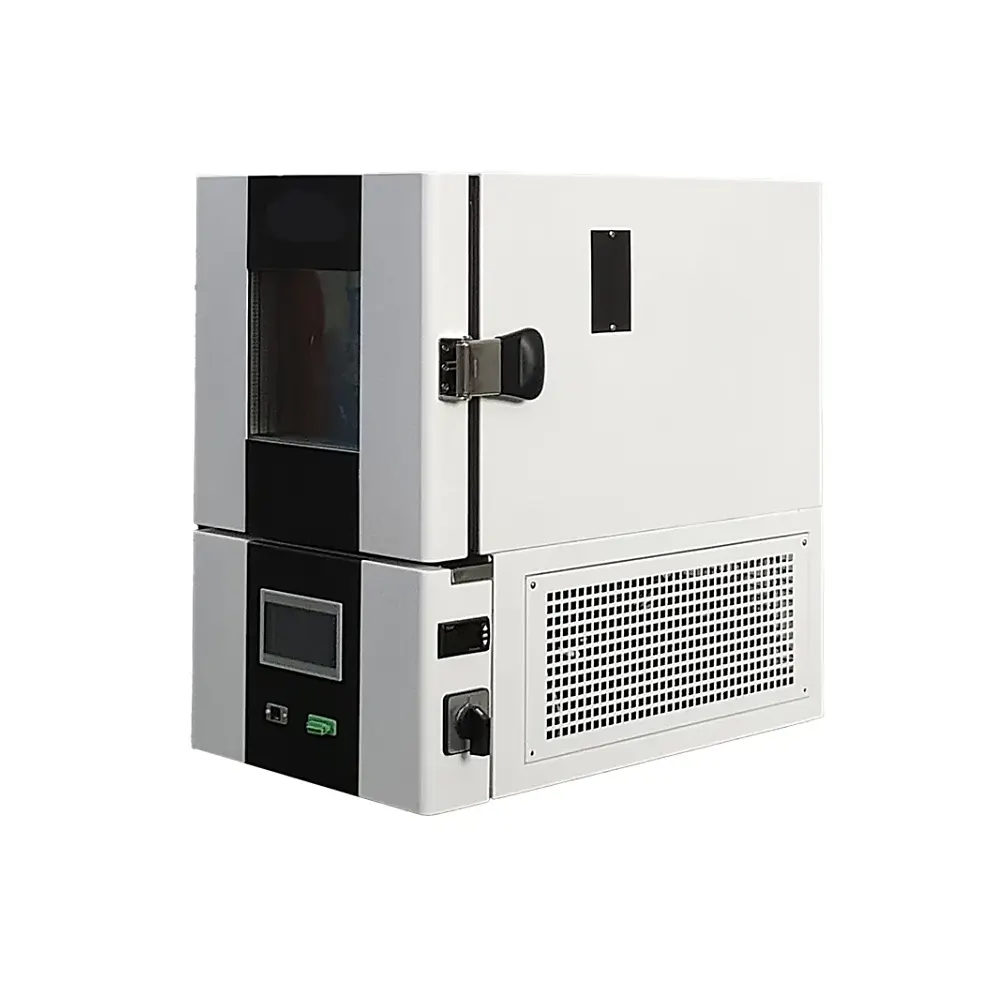
غرفة اختبار الصدمة الحرارية موفرة للطاقة

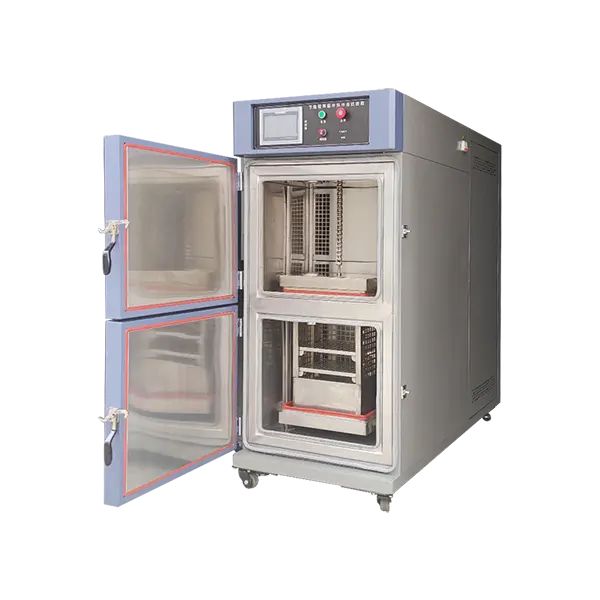
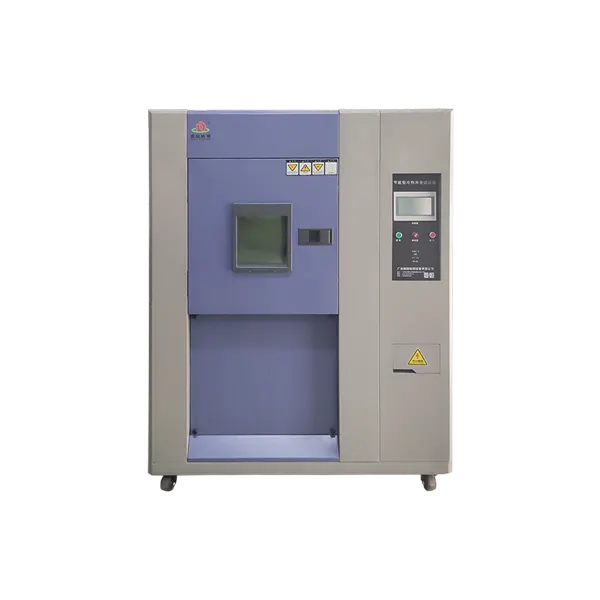
ال DERUI energy-efficient thermal shock test chamber combines rapid hot–cold exposure with load-based capacity control and insulated zone management. Specify transfer, recovery, specimen load and the reference cycle so energy use can be evaluated without compromising test validity.

Test Type: Air-to-air thermal shock
Key Performance: Transfer time and loaded temperature recovery
Efficiency Focus: Capacity control, insulation and reduced zone losses
Energy Metric: Measured kWh under a defined cycle and load
التطبيقات: Electronics, automotive parts, components and material assemblies
آمن وموثوق
مصنوع بشكل جيد
ضمان الجودة
تخصيص
رسالةواتساب
رقم الخط الساخن 15580327593
  • تفاصيل المنتج
  • المعلمات الفنية
  • الأسئلة الشائعة
  • اتصل بنا

Energy-Efficient Air-to-Air Thermal Shock

Rapid Hot–Cold Exposure with Measurable Operating Efficiency

The DERUI energy-efficient thermal shock test chamber is intended for reliability programs that repeatedly expose specimens to stabilized hot and cold environments. Its configuration should be selected around transfer time, specimen recovery, load and cycle profile—then energy use should be compared under those same conditions.

Rapid TransferHot-to-cold exposure within the selected method
Stored Thermal CapacityZones prepared before specimen exposure
Load-Based ControlCapacity matched to specimen demand
Energy ReportingCompare kWh using a defined cycle

Product Purpose

What an Energy-Efficient Thermal Shock Chamber Must Deliver

Thermal shock reveals failures caused by unequal expansion and contraction: solder-joint cracking, package delamination, seal leakage, coating separation, connector movement and intermittent electrical faults. A useful chamber must create the required specimen transition without sacrificing recovery, uniformity or repeatability merely to reduce electricity consumption.

الإلكترونيات والدوائر المتكاملة

Screen components, assemblies, PCBs, connectors and solder joints for damage produced by repeated rapid temperature transitions.

Automotive and Aerospace Parts

Evaluate sensors, control modules, housings, seals and material interfaces against an application-specific shock profile.

Materials and Assemblies

Observe cracking, deformation, adhesion loss and dimensional change in polymers, composites, coatings and bonded structures.

Thermal shock is not ordinary temperature cycling. Shock methods emphasize rapid transfer between stabilized environments and specimen recovery. A single-zone temperature chamber may produce a slower air ramp and a different stress mechanism.

Energy-Saving Design

Where Lower Energy Consumption Can Come From

Capacity Matching and Modulation

cURL Too many subrequests by single Worker invocation. To configure this limit, refer to https://developers.cloudflare.com/workers/wrangler/configuration/#limits.

cURL Too many subrequests by single Worker invocation. To configure this limit, refer to https://developers.cloudflare.com/workers/wrangler/configuration/#limits

cURL Too many subrequests by single Worker invocation. To configure this limit, refer to https://developers.cloudflare.com/workers/wrangler/configuration/#limits.

cURL Too many subrequests by single Worker invocation. To configure this limit, refer to https://developers.cloudflare.com/workers/wrangler/configuration/#limits

cURL Too many subrequests by single Worker invocation. To configure this limit, refer to https://developers.cloudflare.com/workers/wrangler/configuration/#limits.

cURL Too many subrequests by single Worker invocation. To configure this limit, refer to https://developers.cloudflare.com/workers/wrangler/configuration/#limits

cURL Too many subrequests by single Worker invocation. To configure this limit, refer to https://developers.cloudflare.com/workers/wrangler/configuration/#limits.

cURL Too many subrequests by single Worker invocation. To configure this limit, refer to https://developers.cloudflare.com/workers/wrangler/configuration/#limits.

cURL Too many subrequests by single Worker invocation. To configure this limit, refer to https://developers.cloudflare.com/workers/wrangler/configuration/#limits

cURL Too many subrequests by single Worker invocation. To configure this limit, refer to https://developers.cloudflare.com/workers/wrangler/configuration/#limits

cURL Too many subrequests by single Worker invocation. To configure this limit, refer to https://developers.cloudflare.com/workers/wrangler/configuration/#limits cURL Too many subrequests by single Worker invocation. To configure this limit, refer to https://developers.cloudflare.com/workers/wrangler/configuration/#limits.
Temperature recovery time cURL Too many subrequests by single Worker invocation. To configure this limit, refer to https://developers.cloudflare.com/workers/wrangler/configuration/#limits.
Specimen load cURL Too many subrequests by single Worker invocation. To configure this limit, refer to https://developers.cloudflare.com/workers/wrangler/configuration/#limits.
cURL Too many subrequests by single Worker invocation. To configure this limit, refer to https://developers.cloudflare.com/workers/wrangler/configuration/#limits cURL Too many subrequests by single Worker invocation. To configure this limit, refer to https://developers.cloudflare.com/workers/wrangler/configuration/#limits.
cURL Too many subrequests by single Worker invocation. To configure this limit, refer to https://developers.cloudflare.com/workers/wrangler/configuration/#limits.

cURL Too many subrequests by single Worker invocation. To configure this limit, refer to https://developers.cloudflare.com/workers/wrangler/configuration/#limits

cURL Too many subrequests by single Worker invocation. To configure this limit, refer to https://developers.cloudflare.com/workers/wrangler/configuration/#limits

cURL Too many subrequests by single Worker invocation. To configure this limit, refer to https://developers.cloudflare.com/workers/wrangler/configuration/#limits.

1

cURL Too many subrequests by single Worker invocation. To configure this limit, refer to https://developers.cloudflare.com/workers/wrangler/configuration/#limits

cURL Too many subrequests by single Worker invocation. To configure this limit, refer to https://developers.cloudflare.com/workers/wrangler/configuration/#limits.

2

cURL Too many subrequests by single Worker invocation. To configure this limit, refer to https://developers.cloudflare.com/workers/wrangler/configuration/#limits

cURL Too many subrequests by single Worker invocation. To configure this limit, refer to https://developers.cloudflare.com/workers/wrangler/configuration/#limits.

3

cURL Too many subrequests by single Worker invocation. To configure this limit, refer to https://developers.cloudflare.com/workers/wrangler/configuration/#limits

cURL Too many subrequests by single Worker invocation. To configure this limit, refer to https://developers.cloudflare.com/workers/wrangler/configuration/#limits.

cURL Too many subrequests by single Worker invocation. To configure this limit, refer to https://developers.cloudflare.com/workers/wrangler/configuration/#limits cURL Too many subrequests by single Worker invocation. To configure this limit, refer to https://developers.cloudflare.com/workers/wrangler/configuration/#limits. cURL Too many subrequests by single Worker invocation. To configure this limit, refer to https://developers.cloudflare.com/workers/wrangler/configuration/#limits cURL Too many subrequests by single Worker invocation. To configure this limit, refer to https://developers.cloudflare.com/workers/wrangler/configuration/#limits cURL Too many subrequests by single Worker invocation. To configure this limit, refer to https://developers.cloudflare.com/workers/wrangler/configuration/#limits.

cURL Too many subrequests by single Worker invocation. To configure this limit, refer to https://developers.cloudflare.com/workers/wrangler/configuration/#limits

cURL Too many subrequests by single Worker invocation. To configure this limit, refer to https://developers.cloudflare.com/workers/wrangler/configuration/#limits

  • cURL Too many subrequests by single Worker invocation. To configure this limit, refer to https://developers.cloudflare.com/workers/wrangler/configuration/#limits.
  • cURL Too many subrequests by single Worker invocation. To configure this limit, refer to https://developers.cloudflare.com/workers/wrangler/configuration/#limits.
  • Use the same specimen mass, material and initial condition.
  • Run at comparable room temperature and cooling-water conditions.
  • Include preconditioning, active cycling and standby in the measurement boundary.
  • Record total kWh, cycles completed and any failure to recover within tolerance.

Useful Purchasing Metrics

Compare kWh per completed cycle, average active demand, peak electrical demand, cooling-water or facility-chiller load, recovery time and annual operating hours. Lower nameplate kW does not guarantee lower energy use if the chamber takes longer to recover or cannot support the specified load.

Configuration Input

Information DERUI Needs Before Selection

Specimen

Dimensions, quantity, mass, material, heat capacity, power dissipation, cable connections and allowable movement.

Shock Profile

Hot/cold temperatures, dwell, transfer limit, recovery criterion, cycle count and specimen measurements.

Facility

Voltage/frequency, available current, ambient temperature, ventilation, water supply, drainage and permitted heat rejection.

Efficiency Target

Operating hours, electricity cost, comparison baseline and whether the goal is lower kWh, lower peak demand, reduced cooling water or all three.

الأسئلة المتكررة

Energy-Efficient Thermal Shock Chamber FAQs

What is an energy-efficient thermal shock test chamber?

It is a thermal shock system designed to deliver the required transfer, recovery and temperature performance while reducing electricity and facility demand through capacity control, insulation, zone isolation and cycle-aware operation.

How should energy savings be verified?

Measure total kWh using the same cycle, specimen load, room condition, cooling method and measurement boundary as the comparison chamber. Publish the test conditions with any claimed percentage.

Is rated power the same as actual energy consumption?

No. Rated power is a capacity or maximum-demand figure. Energy consumption depends on time, controller duty, load, setpoints, ambient conditions and system efficiency.

What is the difference between two-zone and three-zone thermal shock?

A two-zone design normally transfers the specimen between stabilized hot and cold spaces. A three-zone design commonly keeps the specimen stationary and switches hot, cold and sometimes ambient airflow. Confirm the method's transfer and specimen requirements.

Can a standard temperature chamber replace a thermal shock chamber?

Only if the test method allows its achieved specimen transition. A conventional chamber's air ramp is usually slower than transfer between preconditioned zones and may create a different stress.

Which standards are relevant?

IEC 60068-2-14 is a key change-of-temperature reference. Semiconductor and microelectronic tests may use JESD22-A106 or MIL-STD-883 procedures. The correct method depends on the product and customer requirement.

Does a faster transfer guarantee a valid test?

No. Transfer time is only one requirement. Hot/cold exposure conditions, loaded recovery, dwell, uniformity and specimen measurements must also satisfy the procedure.

What data should be included in a quotation request?

Send the standard and edition, specimen details, temperature profile, transfer and recovery requirements, cycles, monitoring, utilities and the energy-comparison target.

Specify Performance and Energy Use Together

Send DERUI your specimen load, thermal shock method, hot/cold profile, transfer and recovery limits, facility conditions and operating schedule. We will identify the suitable chamber architecture and define how energy consumption should be measured.

Request a Thermal Shock Configuration Review

فيسبوكلينكدإنXريديتواتساب
الموديل DR-H203-50
نطاق الصدمة الحرارية (درجة حرارة عالية: +60℃~+150℃؛ درجة حرارة منخفضة: 0℃~-40℃؛ 0℃~-55℃)
وقت التسخين (منطقة التخزين الحراري) RT~180℃≤35 دقيقة
وقت التبريد (منطقة التخزين البارد) RT~-55℃≤60 دقيقة
وقت استعادة وتثبيت درجة الحرارة 5 دقائق
وقت تحويل درجة الحرارة 2-10 ثواني
مواد الصندوق الداخلي والخارجي الصندوق الخارجي: لوحة فولاذ مقاوم للصدأ مطلية بالمينا ومعالجة ضد الصدأ الصندوق الداخلي: لوحة فولاذ مقاوم للصدأ SUS304#
مواد العزل عازل من رغوة البولي يوريثان PU عالية القوة ومقاوم للحريق + ألياف زجاجية ناعمة جدًا
نظام نظام تحكم بدرجة الحرارة باستخدام PID+SSR+حاسوب صغير
نظام التبريد ضاغط ذو مرحلتين شبه محكم (مبرد بالماء)/ضاغط ذو مرحلتين كامل محكم (مبرد بالهواء)
جهاز حماية السلامة مفتاح غير فيوز، مفتاح حماية ضغط عالي ومنخفض للضاغط، حماية من التيار الزائد، حماية من ارتفاع درجة الحرارة، مفتاح حماية ضغط عالي للمبرد، نظام إنذار الأعطال
ملحقات نافذة عرض (نوع اختياري خاص)، رفان قابلان للتعديل للأعلى والأسفل، ثقب اختبار مصدر الطاقة، عجلات، حاملة تسوية المستوى
مصدر الطاقة 380 فولت تيار متردد 50 هرتز/60 هرتز ثلاث مراحل
المتحكم شاشة لمس LCD بحجم 7 إنش/10 إنش، عرض باللغة الصينية/الإنجليزية
ضاغط ماركة “تايلور” الفرنسية، “بيتر” الألمانية/“بوكس”
المزيد من المعلمات يرجى التواصل معنا!

السؤال 1: هل أنت مصنع؟ هل يمكنك تخصيص المعدات وفقًا لمتطلباتنا الخاصة؟

نعم، نحن مصنع صيني لغرف الاختبار البيئي مع خبرة صناعية تمتد لعشرين عامًا. يمكننا تخصيص المعدات وفقًا لمتطلباتك الدقيقة. فريق البحث والتطوير الداخلي لدينا يقدم خدمات OEM و ODM و OBM لضمان تلبية الحل الخاص بك لاحتياجات عملك.

السؤال 2: كم من الوقت يمكنني الحصول على عرض سعر؟
الجواب 2: عادةً نقدم عروض الأسعار خلال 24 ساعة بعد استلام استفسارك. إذا كنت بحاجة إلى استجابة أسرع، يرجى الاتصال بنا أو مراسلتنا عبر البريد الإلكتروني لإبلاغنا باحتياجاتك العاجلة، وسنولي أولوية لمعالجة استفسارك.

السؤال 3: ما هو الوقت المعتاد لتسليم منتجاتكم؟
الجواب 3: الوقت القياسي للتسليم لمعظم منتجاتنا هو 30 يومًا. بالنسبة للطلبات الكبيرة أو المعدات المخصصة، قد يتم تمديد وقت التسليم إلى 30 إلى 50 يومًا، اعتمادًا على الكمية والمتطلبات الخاصة بالتخصيص.

السؤال 4: ما طرق الدفع التي تقبلونها؟
الجواب 4: نقدم مجموعة متنوعة من خيارات الدفع الآمنة، بما في ذلك باي بال، T/T، فيزا، ويسترن يونيون، وغيرها، لضمان اختيار الطريقة الأكثر ملاءمة لعملية معاملتك.

السؤال 5: ما طرق الشحن المتاحة؟
الجواب 5: نشحن عالميًا عبر طرق متعددة: الشحن البحري، الشحن الجوي، أو الشحن السريع (DHL، FedEx، وغيرها). سنوصي دائمًا بأكثر خيارات الشحن فعالية من حيث التكلفة والكفاءة استنادًا إلى موقعك وتفضيلاتك.

السؤال 6: كيف يتم حساب تكاليف الشحن والضرائب؟
الجواب 6: تعتمد تكاليف الشحن على وسيلة النقل، الوجهة، ووزن المعدات. نقدم دائمًا معلومات واضحة عن رسوم التوصيل مسبقًا. الضرائب تحددها اللوائح المحلية في بلدك وتتم معالجتها بواسطة البلد المستلم.

السؤال 7: هل يتضمن التثبيت والتدريب؟ هل من الضروري وجود فنيين في الموقع؟
الجواب 7: لا حاجة لوجود فنيين في الموقع. جميع آلاتنا مصممة لتكون سهلة التركيب والتشغيل المباشر. نوفر أدلة مستخدم مفصلة وتدريبًا مجانيًا عن بُعد بواسطة مهندسينا الخبراء. إذا كنت بحاجة إلى مساعدة، يمكننا أيضًا إرشادك عبر فيديوهات التثبيت والدعم عن بُعد في الوقت الحقيقي.

السؤال 8: ما نوع خدمة ما بعد البيع التي يمكن أن أتوقعها؟
الجواب 8: نقدم دعمًا مدى الحياة لجميع منتجاتنا. سيستجيب فريقنا الهندسي المحترف لأي مشكلات خلال 12 ساعة. يمكن تشخيص معظم المشاكل وحلها عن بُعد. إذا كانت مشكلة في الأجهزة، سنرسل قطع غيار بديلة مجانًا عبر DHL ونوفر تعليمات تركيب مفصلة.


السؤال 9: هل تقدمون خدمات الضمان لمعداتكم؟
الجواب 9: نعم، جميع المعدات تأتي بضمان شامل لمدة سنة واحدة. كما نوفر خدمات الصيانة والدعم بعد انتهاء فترة الضمان لضمان تشغيل معداتك بأفضل حال لسنوات عديدة قادمة.

السؤال 10: هل يمكنني زيارة مصنعكم؟
الجواب 10: نعم، مرحبًا بك لزيارة مصنعنا في دونغقوان، مصر. رؤية عملياتنا شخصيًا ومناقشة مشروعك وجهًا لوجه سيساعدنا على فهم احتياجاتك بشكل أفضل. يمكننا ترتيب الزيارة وفقًا لراحتك.

هاتفهاتف

الهاتف المجاني:
155 8032 7593

واتسابواتساب
واتساب
لينكد إنلينكد إن

ملف لينكد إن الخاص بـ ديروي

رسالةرسالة

اتصل بنا لنقدم لك خدمة حصرية!