ชั้น 1, หมายเลข 3, ถนนชูการ์, เมืองหงเหมย, ตงกวน, มณฑลกวางตุ้ง, ประเทศจีน

ผู้ผลิตห้องทดสอบสิ่งแวดล้อม 20 ปีส่งมอบลูกค้าทั่วโลกกว่า 3000 ราย           อีเมล: shirley@deruitest.com
สายด่วนให้คำปรึกษาทั่วโลก:+86 15580327593

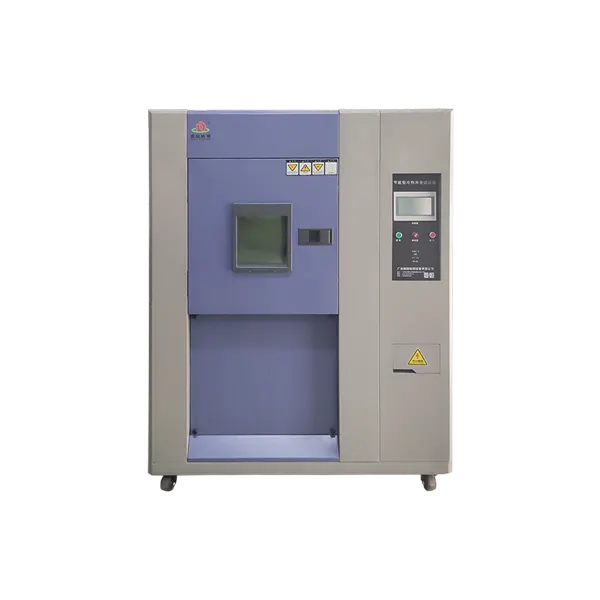
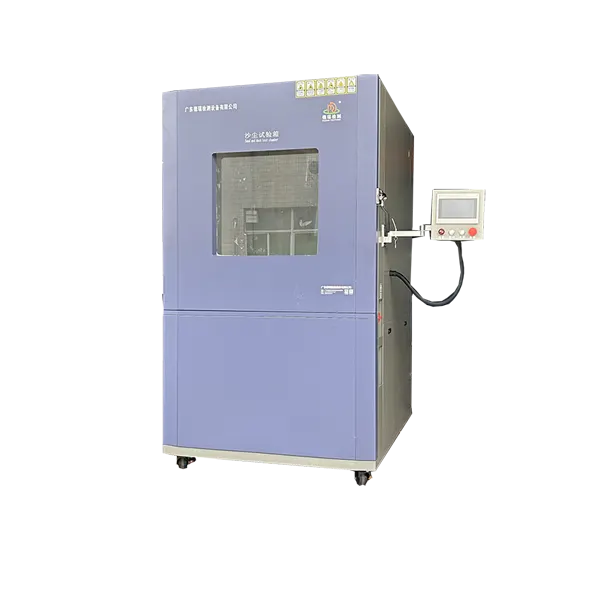
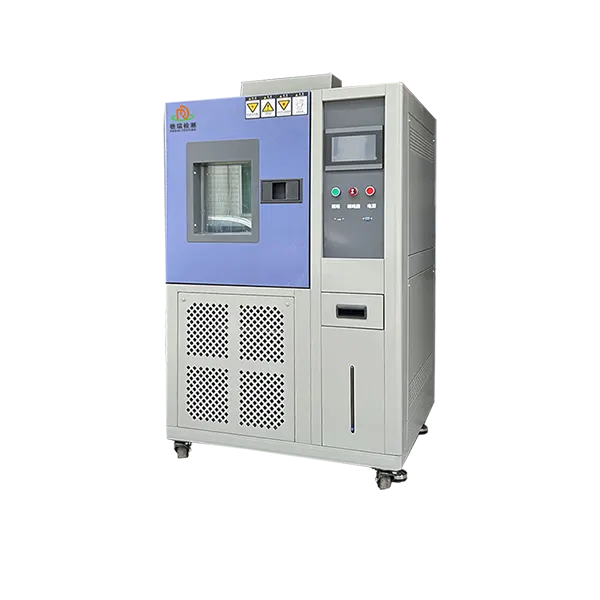
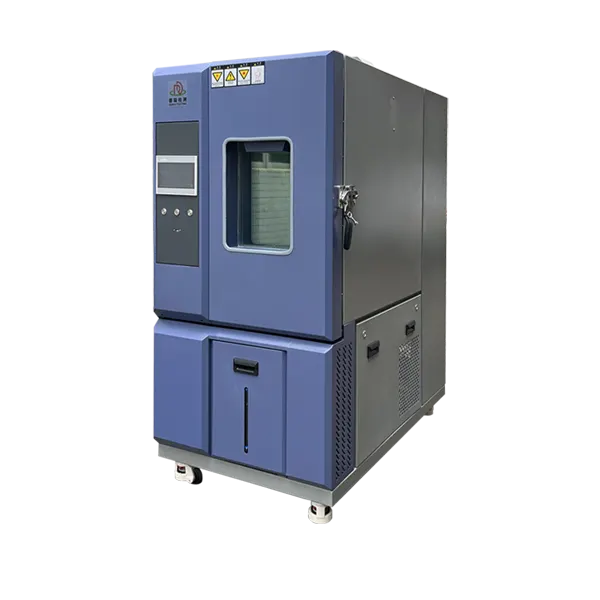
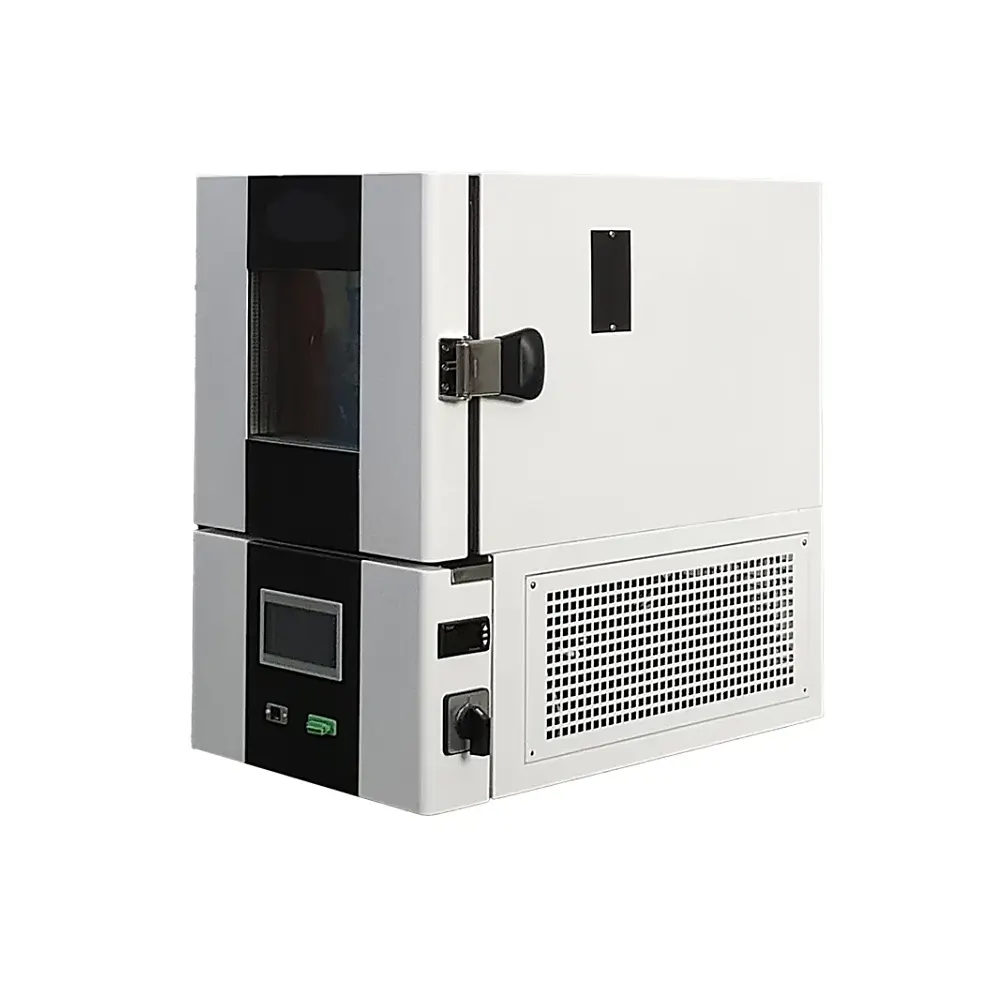
ห้องทดสอบความร้อนช็อกแบบประหยัดพลังงาน

The DERUI energy-efficient thermal shock test chamber combines rapid hot–cold exposure with load-based capacity control and insulated zone management. Specify transfer, recovery, specimen load and the reference cycle so energy use can be evaluated without compromising test validity.

Test Type: Air-to-air thermal shock
Key Performance: Transfer time and loaded temperature recovery
Efficiency Focus: Capacity control, insulation and reduced zone losses
Energy Metric: Measured kWh under a defined cycle and load
การใช้งาน: Electronics, automotive parts, components and material assemblies
ปลอดภัยและเชื่อถือได้
คุณภาพดี
การรับประกันคุณภาพ
การปรับแต่ง
ข้อความWhatsApp
หมายเลขสายด่วน 15580327593
  • รายละเอียดสินค้า
  • พารามิเตอร์ทางเทคนิค
  • คำถามที่พบบ่อย
  • ติดต่อเรา

Energy-Efficient Air-to-Air Thermal Shock

Rapid Hot–Cold Exposure with Measurable Operating Efficiency

The DERUI energy-efficient thermal shock test chamber is intended for reliability programs that repeatedly expose specimens to stabilized hot and cold environments. Its configuration should be selected around transfer time, specimen recovery, load and cycle profile—then energy use should be compared under those same conditions.

Rapid TransferHot-to-cold exposure within the selected method
Stored Thermal CapacityZones prepared before specimen exposure
Load-Based ControlCapacity matched to specimen demand
Energy ReportingCompare kWh using a defined cycle

Product Purpose

What an Energy-Efficient Thermal Shock Chamber Must Deliver

Thermal shock reveals failures caused by unequal expansion and contraction: solder-joint cracking, package delamination, seal leakage, coating separation, connector movement and intermittent electrical faults. A useful chamber must create the required specimen transition without sacrificing recovery, uniformity or repeatability merely to reduce electricity consumption.

อิเล็กทรอนิกส์และเซมิคอนดักเตอร์

Screen components, assemblies, PCBs, connectors and solder joints for damage produced by repeated rapid temperature transitions.

Automotive and Aerospace Parts

Evaluate sensors, control modules, housings, seals and material interfaces against an application-specific shock profile.

Materials and Assemblies

Observe cracking, deformation, adhesion loss and dimensional change in polymers, composites, coatings and bonded structures.

Thermal shock is not ordinary temperature cycling. Shock methods emphasize rapid transfer between stabilized environments and specimen recovery. A single-zone temperature chamber may produce a slower air ramp and a different stress mechanism.

Energy-Saving Design

Where Lower Energy Consumption Can Come From

Capacity Matching and Modulation

cURL Too many subrequests by single Worker invocation. To configure this limit, refer to https://developers.cloudflare.com/workers/wrangler/configuration/#limits.

cURL Too many subrequests by single Worker invocation. To configure this limit, refer to https://developers.cloudflare.com/workers/wrangler/configuration/#limits

cURL Too many subrequests by single Worker invocation. To configure this limit, refer to https://developers.cloudflare.com/workers/wrangler/configuration/#limits.

cURL Too many subrequests by single Worker invocation. To configure this limit, refer to https://developers.cloudflare.com/workers/wrangler/configuration/#limits

cURL Too many subrequests by single Worker invocation. To configure this limit, refer to https://developers.cloudflare.com/workers/wrangler/configuration/#limits.

cURL Too many subrequests by single Worker invocation. To configure this limit, refer to https://developers.cloudflare.com/workers/wrangler/configuration/#limits

cURL Too many subrequests by single Worker invocation. To configure this limit, refer to https://developers.cloudflare.com/workers/wrangler/configuration/#limits.

cURL Too many subrequests by single Worker invocation. To configure this limit, refer to https://developers.cloudflare.com/workers/wrangler/configuration/#limits.

cURL Too many subrequests by single Worker invocation. To configure this limit, refer to https://developers.cloudflare.com/workers/wrangler/configuration/#limits

cURL Too many subrequests by single Worker invocation. To configure this limit, refer to https://developers.cloudflare.com/workers/wrangler/configuration/#limits

cURL Too many subrequests by single Worker invocation. To configure this limit, refer to https://developers.cloudflare.com/workers/wrangler/configuration/#limits cURL Too many subrequests by single Worker invocation. To configure this limit, refer to https://developers.cloudflare.com/workers/wrangler/configuration/#limits.
Temperature recovery time cURL Too many subrequests by single Worker invocation. To configure this limit, refer to https://developers.cloudflare.com/workers/wrangler/configuration/#limits.
cURL Too many subrequests by single Worker invocation. To configure this limit, refer to https://developers.cloudflare.com/workers/wrangler/configuration/#limits cURL Too many subrequests by single Worker invocation. To configure this limit, refer to https://developers.cloudflare.com/workers/wrangler/configuration/#limits.
cURL Too many subrequests by single Worker invocation. To configure this limit, refer to https://developers.cloudflare.com/workers/wrangler/configuration/#limits.

cURL Too many subrequests by single Worker invocation. To configure this limit, refer to https://developers.cloudflare.com/workers/wrangler/configuration/#limits

cURL Too many subrequests by single Worker invocation. To configure this limit, refer to https://developers.cloudflare.com/workers/wrangler/configuration/#limits

cURL Too many subrequests by single Worker invocation. To configure this limit, refer to https://developers.cloudflare.com/workers/wrangler/configuration/#limits.

1

cURL Too many subrequests by single Worker invocation. To configure this limit, refer to https://developers.cloudflare.com/workers/wrangler/configuration/#limits

cURL Too many subrequests by single Worker invocation. To configure this limit, refer to https://developers.cloudflare.com/workers/wrangler/configuration/#limits.

2

cURL Too many subrequests by single Worker invocation. To configure this limit, refer to https://developers.cloudflare.com/workers/wrangler/configuration/#limits

cURL Too many subrequests by single Worker invocation. To configure this limit, refer to https://developers.cloudflare.com/workers/wrangler/configuration/#limits.

3

cURL Too many subrequests by single Worker invocation. To configure this limit, refer to https://developers.cloudflare.com/workers/wrangler/configuration/#limits

cURL Too many subrequests by single Worker invocation. To configure this limit, refer to https://developers.cloudflare.com/workers/wrangler/configuration/#limits.

cURL Too many subrequests by single Worker invocation. To configure this limit, refer to https://developers.cloudflare.com/workers/wrangler/configuration/#limits cURL Too many subrequests by single Worker invocation. To configure this limit, refer to https://developers.cloudflare.com/workers/wrangler/configuration/#limits. cURL Too many subrequests by single Worker invocation. To configure this limit, refer to https://developers.cloudflare.com/workers/wrangler/configuration/#limits cURL Too many subrequests by single Worker invocation. To configure this limit, refer to https://developers.cloudflare.com/workers/wrangler/configuration/#limits cURL Too many subrequests by single Worker invocation. To configure this limit, refer to https://developers.cloudflare.com/workers/wrangler/configuration/#limits.

cURL Too many subrequests by single Worker invocation. To configure this limit, refer to https://developers.cloudflare.com/workers/wrangler/configuration/#limits

cURL Too many subrequests by single Worker invocation. To configure this limit, refer to https://developers.cloudflare.com/workers/wrangler/configuration/#limits

  • cURL Too many subrequests by single Worker invocation. To configure this limit, refer to https://developers.cloudflare.com/workers/wrangler/configuration/#limits.
  • cURL Too many subrequests by single Worker invocation. To configure this limit, refer to https://developers.cloudflare.com/workers/wrangler/configuration/#limits.
  • Use the same specimen mass, material and initial condition.
  • Run at comparable room temperature and cooling-water conditions.
  • Include preconditioning, active cycling and standby in the measurement boundary.
  • Record total kWh, cycles completed and any failure to recover within tolerance.

Useful Purchasing Metrics

Compare kWh per completed cycle, average active demand, peak electrical demand, cooling-water or facility-chiller load, recovery time and annual operating hours. Lower nameplate kW does not guarantee lower energy use if the chamber takes longer to recover or cannot support the specified load.

Configuration Input

Information DERUI Needs Before Selection

Specimen

Dimensions, quantity, mass, material, heat capacity, power dissipation, cable connections and allowable movement.

Shock Profile

Hot/cold temperatures, dwell, transfer limit, recovery criterion, cycle count and specimen measurements.

Facility

Voltage/frequency, available current, ambient temperature, ventilation, water supply, drainage and permitted heat rejection.

Efficiency Target

Operating hours, electricity cost, comparison baseline and whether the goal is lower kWh, lower peak demand, reduced cooling water or all three.

คำถามที่พบบ่อย

Energy-Efficient Thermal Shock Chamber FAQs

What is an energy-efficient thermal shock test chamber?

It is a thermal shock system designed to deliver the required transfer, recovery and temperature performance while reducing electricity and facility demand through capacity control, insulation, zone isolation and cycle-aware operation.

How should energy savings be verified?

Measure total kWh using the same cycle, specimen load, room condition, cooling method and measurement boundary as the comparison chamber. Publish the test conditions with any claimed percentage.

Is rated power the same as actual energy consumption?

No. Rated power is a capacity or maximum-demand figure. Energy consumption depends on time, controller duty, load, setpoints, ambient conditions and system efficiency.

What is the difference between two-zone and three-zone thermal shock?

A two-zone design normally transfers the specimen between stabilized hot and cold spaces. A three-zone design commonly keeps the specimen stationary and switches hot, cold and sometimes ambient airflow. Confirm the method's transfer and specimen requirements.

Can a standard temperature chamber replace a thermal shock chamber?

Only if the test method allows its achieved specimen transition. A conventional chamber's air ramp is usually slower than transfer between preconditioned zones and may create a different stress.

Which standards are relevant?

IEC 60068-2-14 is a key change-of-temperature reference. Semiconductor and microelectronic tests may use JESD22-A106 or MIL-STD-883 procedures. The correct method depends on the product and customer requirement.

Does a faster transfer guarantee a valid test?

No. Transfer time is only one requirement. Hot/cold exposure conditions, loaded recovery, dwell, uniformity and specimen measurements must also satisfy the procedure.

What data should be included in a quotation request?

Send the standard and edition, specimen details, temperature profile, transfer and recovery requirements, cycles, monitoring, utilities and the energy-comparison target.

Specify Performance and Energy Use Together

Send DERUI your specimen load, thermal shock method, hot/cold profile, transfer and recovery limits, facility conditions and operating schedule. We will identify the suitable chamber architecture and define how energy consumption should be measured.

Request a Thermal Shock Configuration Review

เฟซบุ๊กLinkedInXRedditWhatsApp
โมเดล DR-H203-50
ช่วงการช็อกอุณหภูมิ (อุณหภูมิสูง: +60℃~+150℃; อุณหภูมิต่ำ: 0℃~-40℃; 0℃~-55℃)
เวลาทำความร้อน (พื้นที่เก็บความร้อน) RT~180℃≤35นาที
เวลาทำความเย็น (พื้นที่เก็บความเย็น) RT~-55℃≤60นาที
เวลาฟื้นฟูอุณหภูมิและการคงเสถียรของอุณหภูมิ 5นาที
เวลาการแปลงอุณหภูมิ 2-10วินาที
วัสดุของกล่องด้านในและด้านนอก กล่องด้านนอก: แผ่นเหล็กกล้าชุบสังกะสีเคลือบอีนาเมลที่ทนสนิม กล่องด้านใน: แผ่นเหล็กกล้าไร้สนิม SUS304#
วัสดุฉนวนกันความร้อน วัสดุฉนวนกันความร้อนโฟม PU โพลียูรีเทนทนไฟความแข็งแรงสูง + ใยแก้วละเอียดพิเศษ
ระบบ ระบบควบคุมอุณหภูมิแบบ PID+SSR+คอมพิวเตอร์ควบคุมสมดุลอุณหภูมิ
ระบบทำความเย็น คอมเพรสเซอร์แบบสองขั้นตอนกึ่งปิดผนึก (ระบายความร้อนด้วยน้ำ)/คอมเพรสเซอร์แบบสองขั้นตอนเต็ม (ระบายความร้อนด้วยอากาศ)
อุปกรณ์ป้องกันความปลอดภัย สวิตช์ไม่ใช้ฟิวส์, สวิตช์ป้องกันแรงดันสูงและต่ำของคอมเพรสเซอร์, การป้องกันกระแสเกิน, การป้องกันความร้อนเกิน, สวิตช์ป้องกันแรงดันสูงของสารทำความเย็น, ระบบสัญญาณเตือนข้อผิดพลาด
อุปกรณ์เสริม หน้าต่างมองเห็น (ประเภทพิเศษตัวเลือก), ชั้นวางปรับได้สองชั้นด้านบนและด้านล่าง, รูทดสอบไฟฟ้า, ล้อเลื่อน, ขาตั้งปรับระดับ
แหล่งจ่ายไฟ AC380V50HZ/60HZ 3∮
คอนโทรลเลอร์ คอนโทรลเลอร์หน้าจอสัมผัส LCD ขนาด 7 นิ้ว/10 นิ้ว จีน/อังกฤษ
คอมเพรสเซอร์ ฝรั่งเศส “Taylor”, เยอรมัน “Bitzer”/“Bock”
พารามิเตอร์เพิ่มเติม กรุณาติดต่อเรา!

คำถามที่ 1: คุณเป็นผู้ผลิตหรือไม่? คุณสามารถปรับแต่งอุปกรณ์ให้ตรงตามความต้องการเฉพาะของเราได้หรือไม่?

ใช่ เราเป็นผู้ผลิตห้องทดสอบสิ่งแวดล้อมจากจีนที่มีประสบการณ์ในอุตสาหกรรม 20 ปี เราสามารถปรับแต่งอุปกรณ์ตามความต้องการของคุณได้อย่างแม่นยำ ทีมงาน R&D ภายในของเรามีบริการ OEM, ODM และ OBM เพื่อให้แน่ใจว่าวิธีแก้ปัญหาของคุณตรงตามความต้องการทางธุรกิจของคุณ.

คำถามที่ 2: ฉันจะได้รับใบเสนอราคาภายในเวลาเท่าไร?
คำตอบ 2: โดยปกติเราจะให้ใบเสนอราคาภายใน 24 ชั่วโมงหลังจากได้รับคำถามของคุณ หากคุณต้องการคำตอบที่รวดเร็วขึ้น กรุณาโทรหรืออีเมลแจ้งความเร่งด่วนของคุณ แล้วเราจะให้ความสำคัญกับการดำเนินการคำถามของคุณเป็นอันดับแรก.

คำถามที่ 3: เวลาการจัดส่งสินค้าของคุณเป็นปกติเท่าไร?
คำตอบ 3: เวลาการจัดส่งมาตรฐานสำหรับสินค้าส่วนใหญ่ของเราอยู่ที่ 30 วัน สำหรับคำสั่งซื้อขนาดใหญ่หรืออุปกรณ์ที่ปรับแต่งเอง เวลาการจัดส่งอาจขยายเป็น 30 ถึง 50 วัน ขึ้นอยู่กับปริมาณและความต้องการปรับแต่ง.

คำถามที่ 4: คุณรับวิธีการชำระเงินแบบใดบ้าง?
คำตอบ 4: เรามีตัวเลือกการชำระเงินที่ปลอดภัยหลากหลาย รวมถึง PayPal, T/T, Visa, Western Union ฯลฯ เพื่อให้คุณสามารถเลือกวิธีที่สะดวกที่สุดสำหรับธุรกรรมของคุณ.

คำถามที่ 5: วิธีการจัดส่งที่มีให้เลือกคืออะไร?
คำตอบ 5: เราจัดส่งทั่วโลกผ่านหลายวิธี: ขนส่งทางเรือ, ขนส่งทางอากาศ หรือด่วน (DHL, FedEx ฯลฯ) เรายังคงแนะนำตัวเลือกการจัดส่งที่คุ้มค่าที่สุดและมีประสิทธิภาพสูงสุดตามตำแหน่งและความต้องการของคุณ.

คำถามที่ 6: ค่าขนส่งและภาษีคำนวณอย่างไร?
คำตอบ 6: ค่าขนส่งขึ้นอยู่กับวิธีการขนส่ง ปลายทาง และน้ำหนักของอุปกรณ์ เรามักจะให้ข้อมูลค่าใช้จ่ายในการจัดส่งอย่างชัดเจนล่วงหน้า ภาษีจะถูกกำหนดโดยกฎหมายท้องถิ่นในประเทศของคุณและดำเนินการโดยประเทศปลายทาง.

คำถามที่ 7: รวมการติดตั้งและการฝึกอบรมด้วยหรือไม่? จำเป็นต้องมีช่างเทคนิคอยู่หน้างานหรือไม่?
คำตอบ 7: ไม่จำเป็นต้องมีช่างเทคนิคอยู่หน้างาน เครื่องของเราออกแบบให้ติดตั้งง่ายและใช้งานได้ทันที เรามีคู่มือผู้ใช้รายละเอียดและการฝึกอบรมทางไกลฟรีโดยวิศวกรผู้เชี่ยวชาญของเรา หากคุณต้องการความช่วยเหลือ เรายังสามารถแนะนำผ่านวิดีโอการติดตั้งและสนับสนุนแบบเรียลไทม์ทางไกล.

คำถามที่ 8: ฉันจะคาดหวังบริการหลังการขายแบบไหนได้บ้าง?
คำตอบ 8: เรามีการสนับสนุนตลอดอายุการใช้งานสำหรับสินค้าทุกชิ้น ทีมวิศวกรมืออาชีพของเราจะตอบสนองต่อปัญหาใด ๆ ภายใน 12 ชั่วโมง ปัญหาส่วนใหญ่สามารถวินิจฉัยและแก้ไขได้ทางไกล หากเป็นปัญหาเกี่ยวกับฮาร์ดแวร์ เราจะส่งชิ้นส่วนทดแทนฟรีผ่าน DHL และให้คำแนะนำการติดตั้งอย่างละเอียด.


คำถามที่ 9: คุณมีบริการรับประกันสำหรับอุปกรณ์ของคุณหรือไม่?
คำตอบ 9: ใช่ อุปกรณ์ทั้งหมดมาพร้อมกับการรับประกันครอบคลุมหนึ่งปี เรายังให้บริการบำรุงรักษาและสนับสนุนหลังจากช่วงรับประกันเพื่อให้แน่ใจว่าอุปกรณ์ของคุณทำงานได้ดีที่สุดในอีกหลายปีข้างหน้า.

คำถามที่ 10: ฉันสามารถเยี่ยมชมโรงงานของคุณได้ไหม?
คำตอบ 10: ได้ คุณยินดีต้อนรับเยี่ยมชมโรงงานของเราในดงกวน ประเทศไทย การเห็นการดำเนินงานของเราโดยตรงและพูดคุยเกี่ยวกับโครงการของคุณแบบตัวต่อตัวจะช่วยให้เราเข้าใจความต้องการของคุณได้ดีขึ้น เรายินดีจัดการเยี่ยมชมตามความสะดวกของคุณ.

โทรศัพท์โทรศัพท์

สายด่วน:
155 8032 7593

WhatsAppWhatsApp
WhatsApp
LinkedinLinkedin

โปรไฟล์ LinkedIn ของ Derui

ข้อความข้อความ

ติดต่อเราเพื่อให้บริการพิเศษแก่คุณ!